Figma Logo – Figma to HubSpot or WordPress
WordPress CMS Logo – Figma to WordPress CMS

Convert Figma Forms to WordPress Without Coding

The tedious design-to-development handoff of converting a custom form from Figma to WordPress is now obsolete. Using transjt.ai, you can leverage AI-powered form conversion to instantly turn your designs—whether a lead capture form, a multi-page onboarding questionnaire, or a contact form—into fully functional, responsive WordPress forms. This guide provides the exact code-free blueprint to automate the process, completely eliminating the need for developers to write custom CSS.

Start for free
Trusted by:
vendortell-3
sparkforce
tier-one
learnslice
orixcom
merritt
poscash
md market design
worky
qxo
sweep
traceair
Remotelock
nexapp
travelnest-1
america AA-1

From Design to Database: How Code-Free Figma Form Conversion Actually Works

The Fast Path: AI-Powered Form Conversion

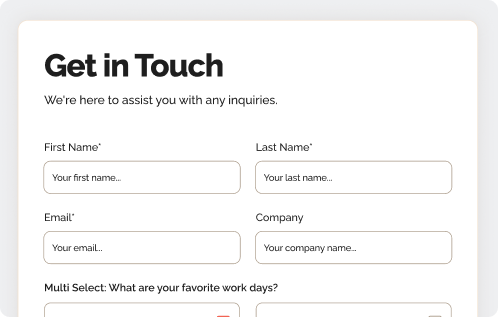
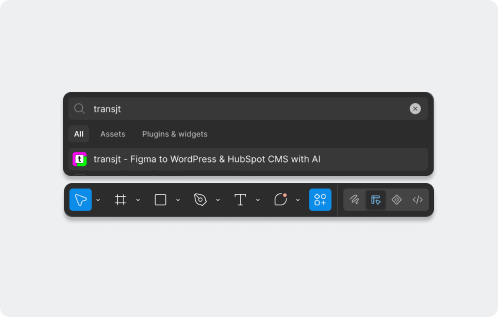
Instead of guessing dimensions, an AI-powered converter reads your Figma layout, input fields, labels, placeholders, and Auto Layout structures. It automatically translates them into a functioning WordPress form with all your visual styles intact. This is where transjt.ai excels: you design your inputs and submit buttons natively in Figma, run the plugin, and instantly receive a responsive WordPress form that maps to backend database fields. You get pixel-perfect design accuracy without wasting hours on CSS styling or field mapping.

The Manual Path: The Visual Form-Builder Route

Prefer the traditional route? You can recreate your form by hand inside WordPress plugins like WPForms, Gravity Forms, or Elementor Forms. While these builders are great for basic fields, matching your exact Figma spacing, border-radii, custom checkboxes, and typography requires a lot of manual tweaking, custom CSS, or third-party style add-ons. It gives you control, but it turns a 5-minute task into a half-day manual alignment struggle.

The Alternative Path: Traditional Layout Converters

Other generic layout converters exist on the market. They are decent at converting static blocks or dropping a basic frame into a page builder, but they often struggle with form logic, accessibility tags, and inputs. transjt.ai is built to recognize interactive states, ensuring your input fields remain dynamic and fully functional upon export.

Conversion methods compared

Not every form setup is built the same way. Before you choose your workflow, look at how the AI-powered automated path stacks up against traditional manual rebuilding on the things that impact your timeline and web performance.

Feature / Metric AI conversion (transjt.ai) Manual Form Builders (WPForms / Gravity Forms)
Speed ⚡ Minutes per page ⏳ Hours of setup and custom CSS styling
Design Accuracy ~90–95% out of the box (matches Figma padding & borders) Requires manual visual tuning or extensive CSS overrides
Field Mapping Automated (detects text inputs, textareas, checkboxes) Manual drag-and-drop field matching
Interactive States Retains hover, focus, and active button styling Limited to the form builder's default themes
Best for Bespoke lead gen forms, multi-step layouts, high-converting landing pages Basic, low-design contact forms
Open in Figma
From Design to Function

Step-by-Step: Code-Free Form Conversion Blueprint

Auto-layout-1
Step 1

Prepare Your Figma Form Layout

Enforce Auto Layout on your input fields, labels, and form wrappers. This directly translates to responsive CSS flexbox rules on your WordPress site. Group labels and inputs together sequentially (e.g., placing the "Email Address" text label directly above its input box within an Auto Layout frame).
Step 2

Define and Label Your Form Elements

Clearly name your layers and text styles in Figma so the AI recognizes them. Use proper input styling placeholders (e.g., a light gray text field reading "Enter your email..."). transjt.ai looks at these cues to determine what is a text area, what is a dropdown menu, and what is the submit button.
Define and Label Your Form Elements
Run the transjt.ai Plugin
Step 3

Run the transjt.ai Plugin

Open your finalized form layout in Figma. Launch the transjt plugin (Plugins → transjt), select the frame containing your form, and choose WordPress as your project type. The AI engine processes the visual architecture and compiles the functional components into your transjt.ai workspace.
Step 4

Export and Activate in WordPress

Install and activate the transjt plugin on your WordPress site. Link your site to your secure workspace, and export your generated form theme. The form generates seamlessly as a block, shortcode, or custom element ready to place on any page.
Export Theme to WordPress
Post-import polish & responsiveness_
Step 5

Post-Import Polish & Submission Logic

Once imported, perform a quick quality check:
  • Test Responsiveness: Check the form on mobile viewports to ensure fields don't overflow.
  • Configure Actions: Connect the form's backend to your desired destination—whether it's sending an email notification, storing entries in the WordPress dashboard, or syncing leads straight to your CRM.

Pitfalls to avoid

With transjt you can build any component and website: You only need some time for a quick refinement.

Unlabeled Form Fields (Accessibility Issues)

Don't rely solely on placeholder text inside an input field. Always include a clear visual or structural text label for screen readers to ensure your WordPress form complies with accessibility web standards (WCAG).

Adding Bloated Styling Plugins

Stacking three different third-party style add-ons onto WordPress to make a standard form builder look like your Figma design will destroy your site's performance. Exporting a clean, natively styled form block with transjt.ai protects your Core Web Vitals.

Flattening Checkboxes or Radio Buttons

Do not flatten your custom checkbox designs into standard vector shapes or static PNGs. Keep them as distinct interactive components in Figma so the converter understands their operational toggle behavior.

Ignoring Focus & Error States

Forms are interactive components. Remember to design what happens when a user clicks into a field (focus state) or enters an invalid email address (error state) so your final WordPress form feels polished and professional.

Is No-Code Form Conversion Right for You?

Rebuilding a custom, highly styled form component frame-by-frame inside a clunky WordPress plugin is a relic of the past. If you are building standard marketing websites, conversion-driven landing pages, or user acquisition flows, AI-powered conversion is an absolute game-changer. It shrinks development timelines from hours to seconds, eliminates styling friction, and gives designers total control over the end-user experience.

Structure your layers cleanly, trust your Auto Layout boundaries, and let transjt.ai handle the heavy lifting.

→ Start converting your Figma design with transjt.ai

FAQs

Figma to WordPress Form Conversion

Yes. AI tools analyze the layout, typography, borders, and spacings of your Figma file and translate them automatically into a clean, functional WordPress element, bypassing manual HTML, CSS, or PHP rendering.