We know the struggle: you want the complete design freedom of Figma, but you need the robust data handling of HubSpot. Today, we are bridging that gap.
We are excited to roll out a new feature that allows you to link your designed Figma Forms directly to native HubSpot Forms via intelligent Field Mapping and transjt.
Here is your step-by-step guide to mastering this new workflow.
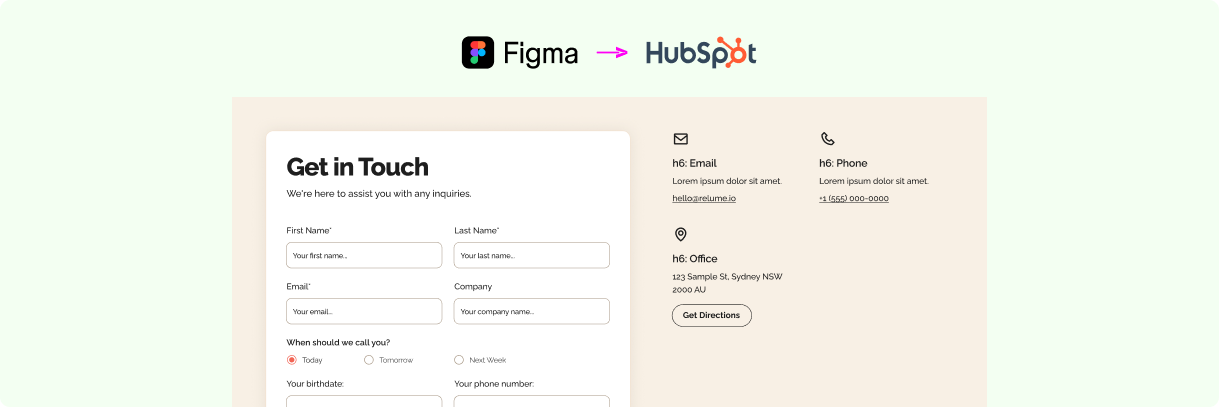
The Workflow: From custom designed Figma Form to an integrated HubSpot CMS Form in under 5 minutes.
1. Design in Figma
Start where you are most creative—Figma. Design your form exactly how you want it to look.
Note: You can use all standard field types (inputs, checkboxes, dropdowns, radios, etc.), but please exclude file upload functionality for this integration.
2. Import & Export
Once your design is ready:
-
Import the form design into transjt.ai
-
Use the transjt export feature to push the module to your HubSpot portal.
3. Create the Native HubSpot Form
Now, switch over to your HubSpot account.
-
First create a native HubSpot form.
-
Ensure this form contains the exact same fields as your design (e.g., First Name, Email, Company, etc.).
-
Pro Tip: If your design includes custom data points (like "Preferred Call Time"), you may need to create Custom Properties in HubSpot first, and then add them to your native form.
The Key Step: Field Mapping
This is where the magic happens. You need to tell the designed form exactly where to send the data for each specific field.
Go back to your Designed Form in HubSpot and locate the "Fields Mapping" section on the left side of the form configuration panel. For every input field in your design, you will need to add a specific mapping string based on the HubSpot Object Type and the Value (Internal Name).
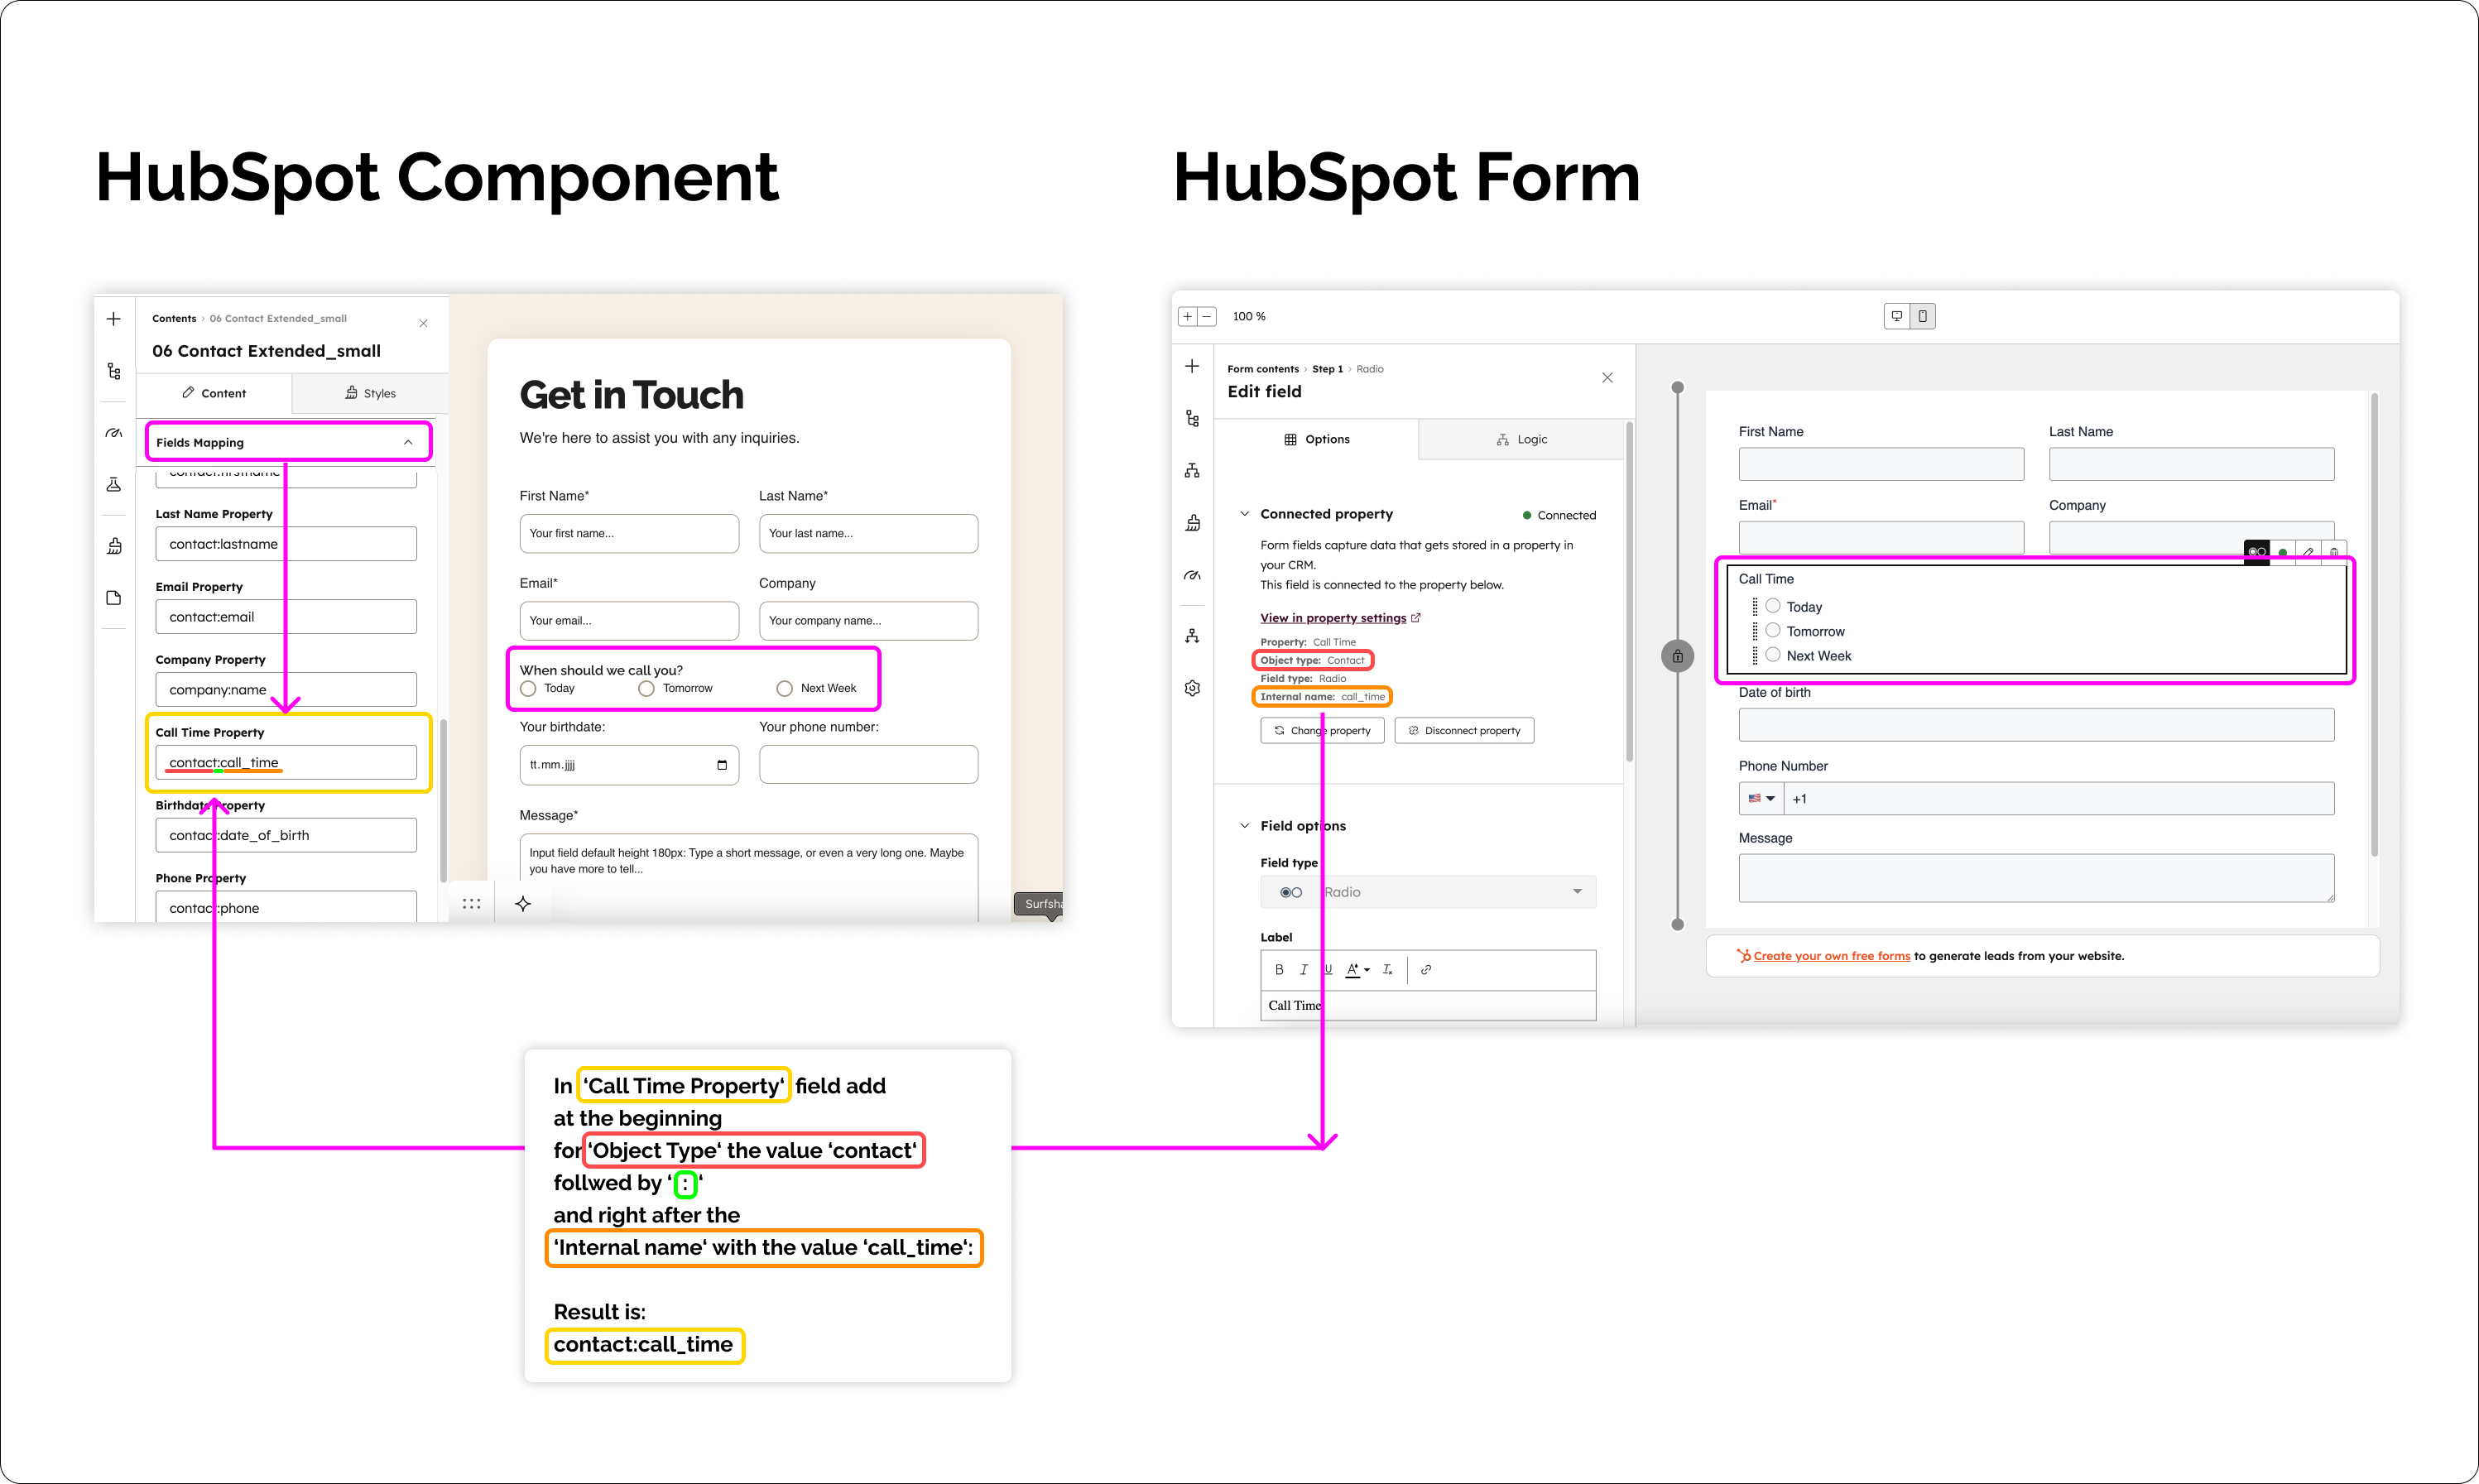
How to construct the Mapping String:
The syntax is simple: ObjectType:InternalName
-
Object Type: Usually
contactorcompany. -
Value: The internal name of the property in HubSpot (e.g.,
firstname,email,call_time).
Real-World Example: "Call Time"
Let's say you have a custom field asking leads for their preferred Call Time.
-
Check HubSpot: You created a property where the Object Type is
contactand the internal name iscall_time -
Create the String: Combine them to get
contact:call_time. -
Apply to the designed Form: In the "Fields Mapping" section for that specific input field, enter: contact:call_time
Once mapped the beautiful frontend, and HubSpot acts as the powerful backend. When a user hits submit on your custom design, the data lands instantly in the correct field in your CRM.
Want to see the step by step guide?
Watch the video below and try it out!
Why this matters
-
Total Design Control: No more fighting with HubSpot's default styling.
-
Clean Data: Map fields precisely so your database stays organized.
-
Seamless Integration: Keep your marketing automation running without missing a beat.